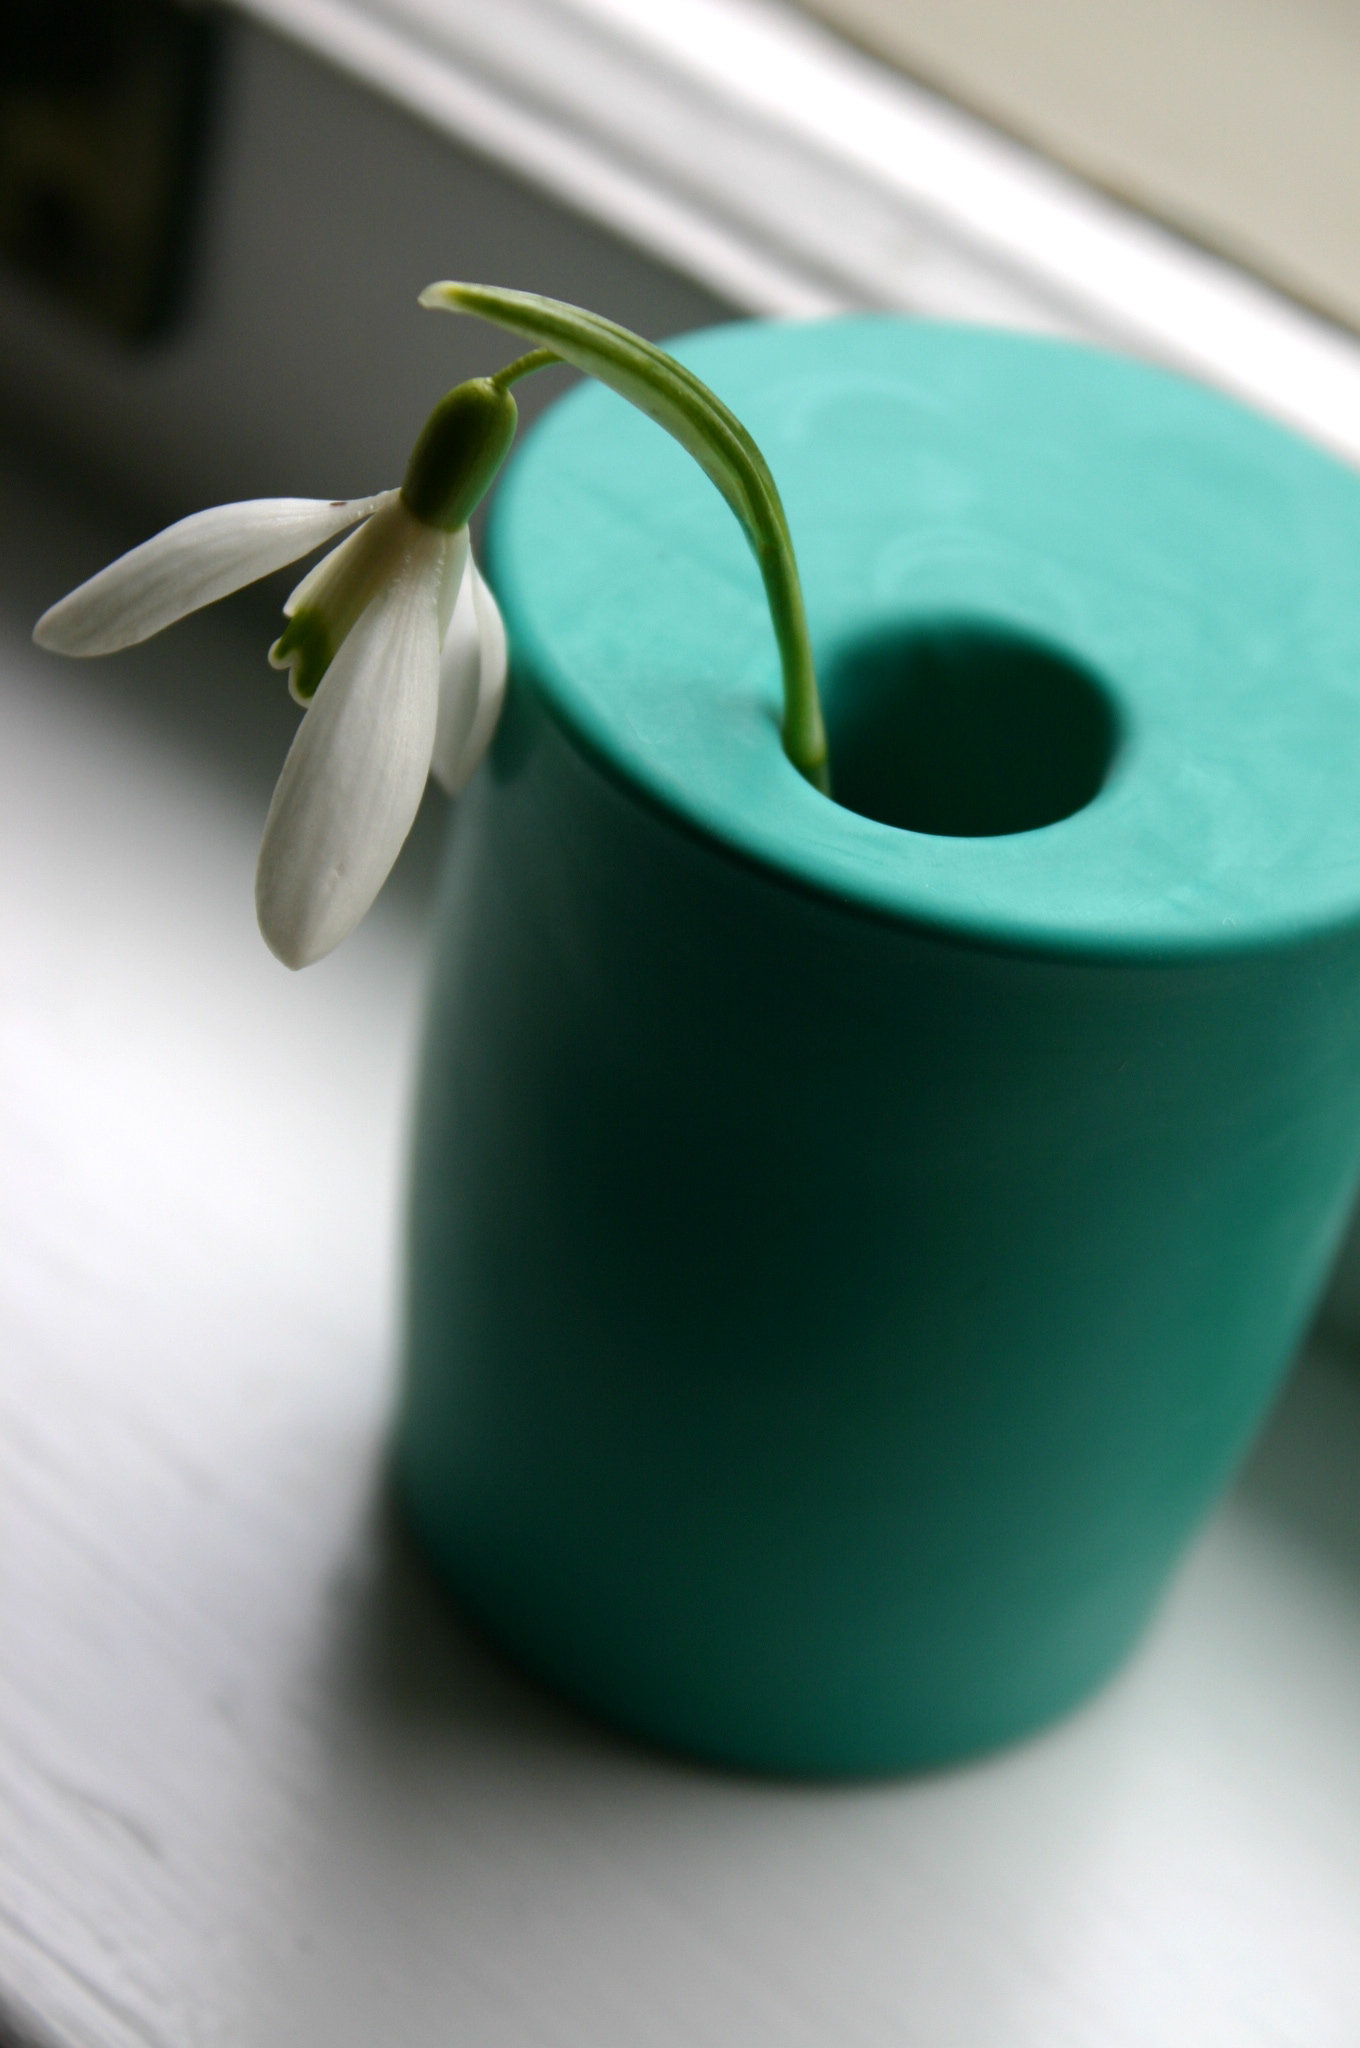
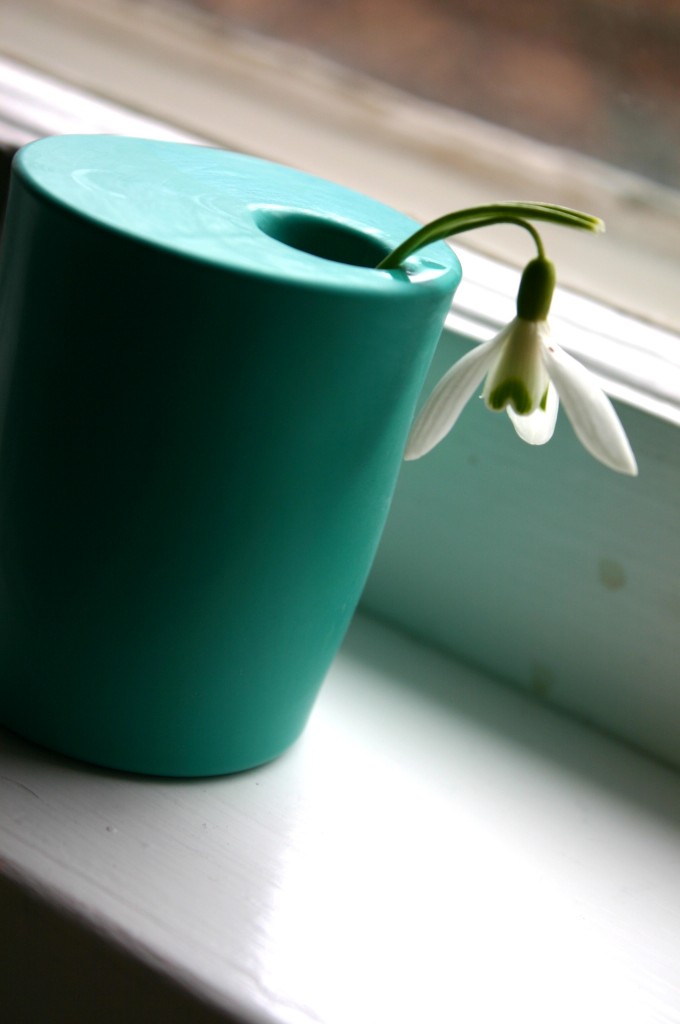
I know Spring has arrived when my daughters start bringing me bouquets of freshly picked (and incredibly tiny) flowers. Their heartfelt offerings of Snowdrops, Violets & Bluebells make the most charming gifts, however, finding a vase to hold them is not an easy task (many times these clippings are under 2-inches in height). I decided to put an end to this problem and came up with a chic and modern vessel to hold my most cherished bouquets.
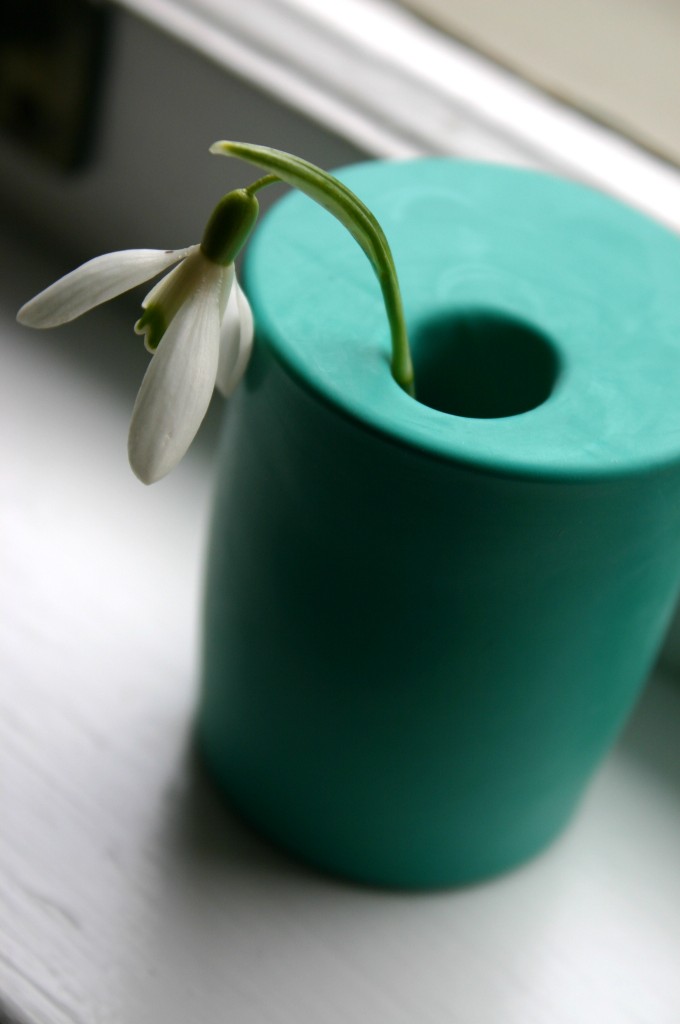
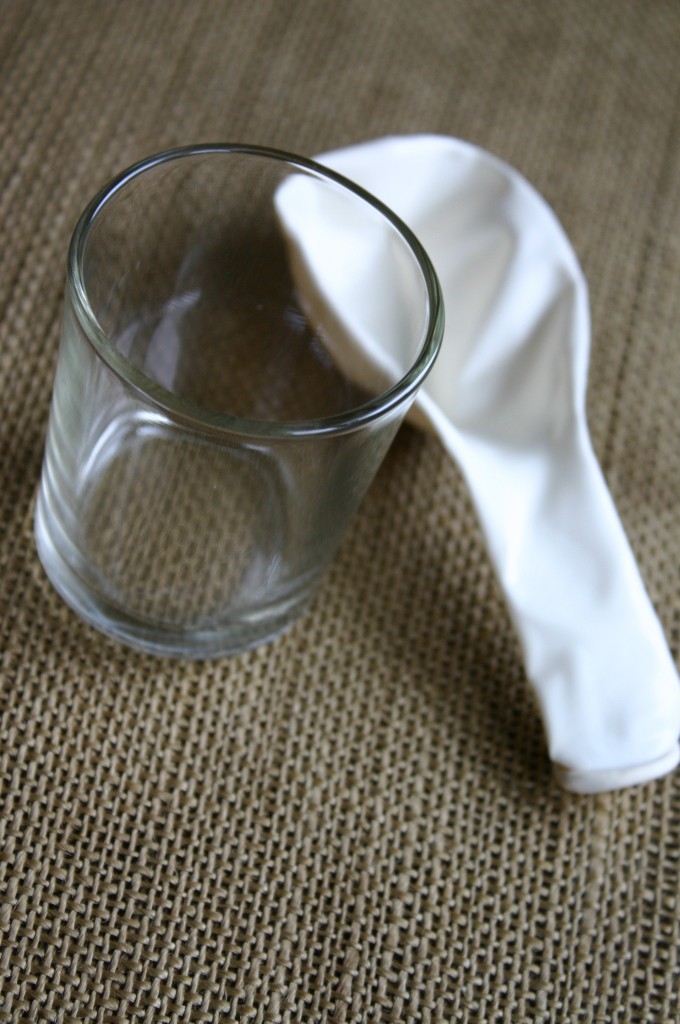
A balloon and a glass votive candle holder are all you'll need to make this diminutive vase that can effectively hold even the smallest of flowers.
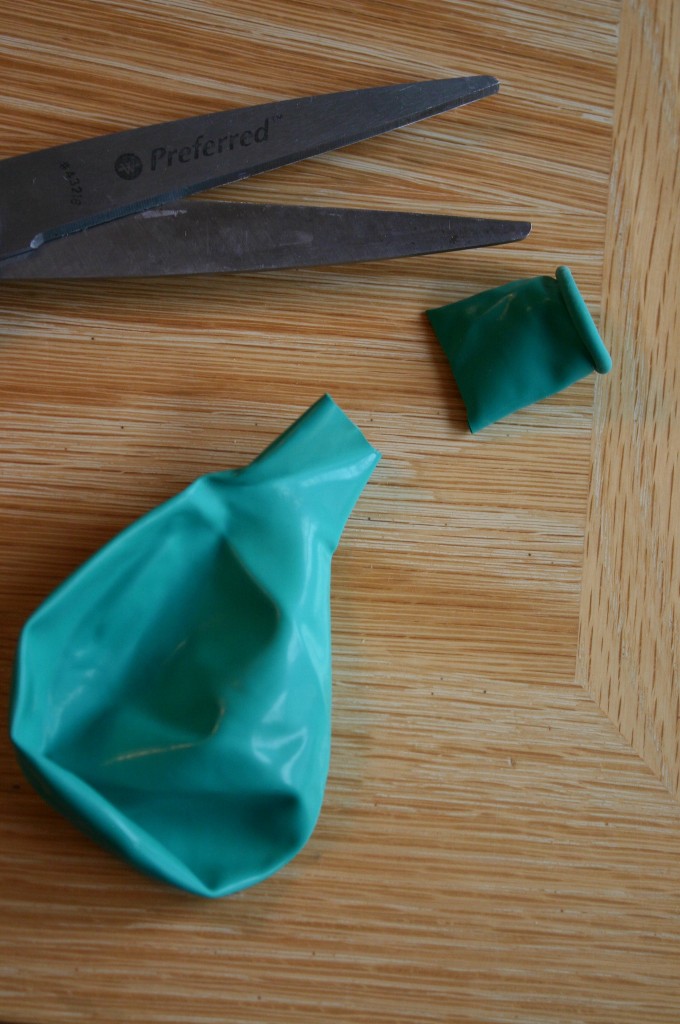
Using a sharp pair of scissors, cut off about 1-inch at the mouth of the balloon. It is important to leave the narrow part of the balloon intact as this will serve as the neck of the vase.
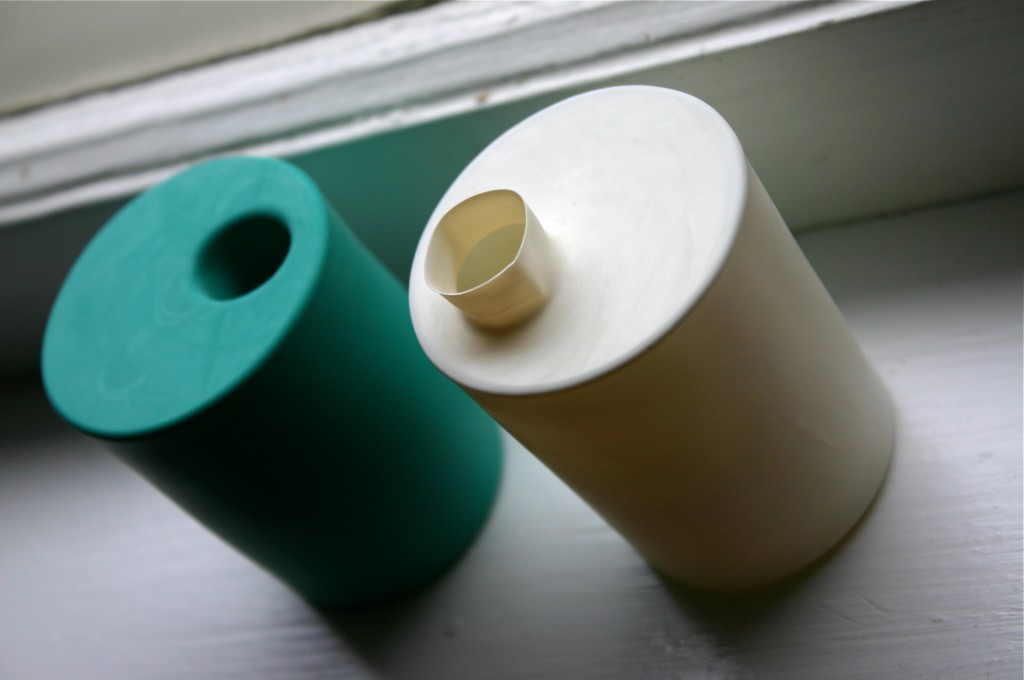
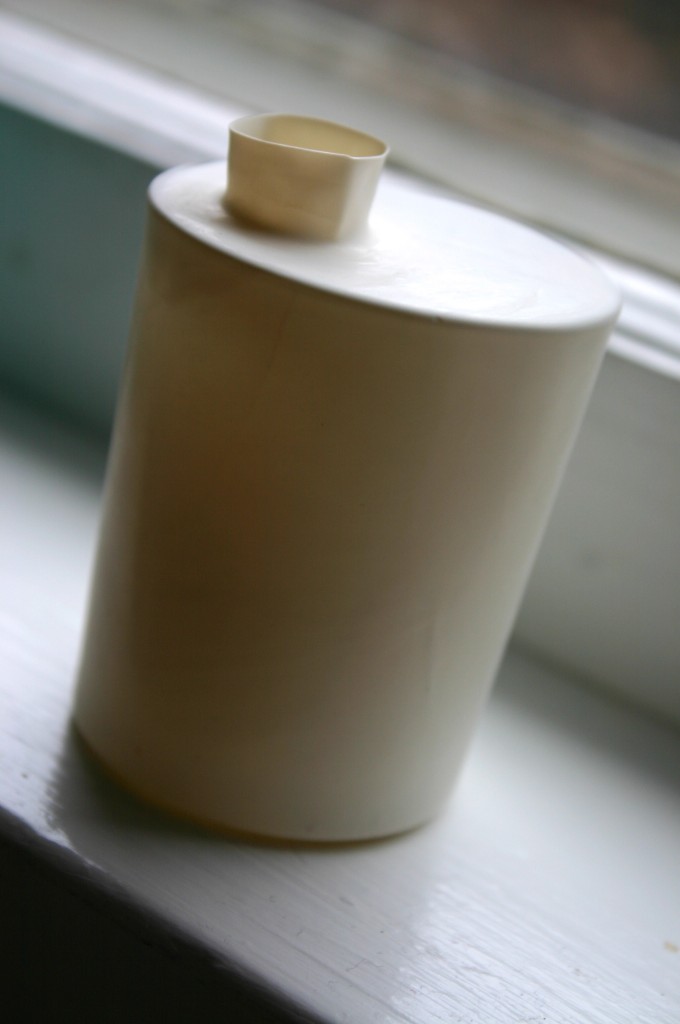
Slip the cut balloon over the glass votive and, depending on your preference, pull out the opening - or push it inside.
If you are looking for a craft to work on with a group of kids, you could make these as a Mother’s Day gift – as I believe most Moms have this happy problem.

Sylvie Créative
March 23, 2011 at 10:08 am
How nice! Lovely idea!
mollie
March 23, 2011 at 10:11 am
what a beautiful solution!
kristin
March 23, 2011 at 10:30 am
brillant!!
Brenda
March 23, 2011 at 10:40 am
Now…this is what I call “crafty, creative and simply wonderful” Love it !!!
I’m a grandmother
shalini
March 23, 2011 at 11:05 am
Wow, how interesting and unique! It’s a really great idea.
dede
March 23, 2011 at 12:02 pm
Hi Camilla,
I want to compliment you on your blog… it is beautiful and inspiring. I’ve used some of your craft and decor ideas, and I always smile at your posts. Please keep going. And thanks for your work.
Regards,
dede
(in La Grange Park, IL)
camilla
March 23, 2011 at 12:15 pm
Thanks dede,
That is the kindest thing! Thanks for taking the time to leave such a lovely comment. I really appreciate it 🙂 Camilla
Donna@soakinginmustard.com
March 23, 2011 at 12:23 pm
fabulous and fun idea, thanks for sharing.
found it made it
March 23, 2011 at 2:30 pm
Oh my goodness, these vases are absolutely brilliant! I’m totally having a facepalm-why-didn’t-I-think-of-that moment. Great work dear!
fee@chippernelly
March 23, 2011 at 2:48 pm
1 word…genius
fee x
Heather @ Life Gluten Free
March 23, 2011 at 4:01 pm
Before I saw how you made these (with a balloon!) I was convinced they were painted ceramic vases. They are so pretty and how simple too. So I am not the only one with that problem? 🙂 Last spring my daughter brought my these sweet tiny flowers too and I ended up putting them in a very small mason jar.
catie
March 23, 2011 at 4:43 pm
this is brilliant ~ cannot wait to try it!
i have used a vintage salt shaker as a vase for tiny flowers,
with the thinnest of stems poked through the holes in the top. ♥
Decora Recicla Imagina…
March 23, 2011 at 5:19 pm
Is It true? Oh my God! You are a genius! Thank’s for sharing!
Jen
March 23, 2011 at 6:43 pm
Brilliant! I can’t wait to create these. I currently have a vase full of twigs and super dried flowers that were left in the garden from last year and picked this spring. My daughter picked them so I love them just the same. I can’t wait for the flowers to start blooming here… it will be a while, we just got a last season snow storm today. Lovely.
Hannah
March 26, 2011 at 6:00 pm
This is the coolest idea!
Pingback
Bonnie@WhatAboutPie
March 26, 2011 at 7:27 pm
Ok, you have just thoroughly impressed me! Clever, clever, clever. We have not had any tiny little flowers poking up here yet…but, I can’t wait when they do. This makes such a cute vase! The first photo on this post…..I thought it was a ceramic vase! I would have never ever guessed that that was a balloon! I love it!
camilla
March 26, 2011 at 10:06 pm
Thanks Bonnie! C
lena muniz
March 27, 2011 at 10:48 am
i loved! tks! i shared, ok? your link is there!
lena
camilla
March 27, 2011 at 1:02 pm
Thanks Lena! Your site is lovely, C
Pingback
Princesstefer
March 29, 2011 at 3:20 pm
<3 this idea! 🙂
tamzen
March 30, 2011 at 5:11 am
Hi camilla,
a wonderful wonderful blog, you are a creative guru!- I’ve used this idea and credited you on a blog post- forthcoming on 4/9 – I’ve linked to your blog, and hope you will let me use the idea. Just inspired and every project you come up with is unique!
tamzen
camilla
March 30, 2011 at 6:49 am
Thank you Tamzen! I am so flattered, thanks for letting me know. Have a wonderful day, Camilla
adriana
March 30, 2011 at 5:37 pm
me encanto tu idea, adelante.-
Kristel
March 31, 2011 at 2:58 am
Mais quelle idée géniale!
Heather - Dollar Store Crafts
March 31, 2011 at 6:36 pm
this is awesome! i am linking at my new site decor hacks next week! http://decorhacks.com
camilla
March 31, 2011 at 8:02 pm
Thanks Heather!!! I can’t wait to see your new site -Congratulations!
deise
April 2, 2011 at 8:05 pm
It´s a freat ideia!!!!!
fabulous!!!
Deise – Brazil
Pingback
Pingback
Pingback
Madelise
April 11, 2011 at 8:02 pm
Fantastic! I put tiny arrangements in perfume bottles… once all the perfume is used up, remove the spray nozzle part with pliers. Rinse the bottle very well of course. The perfume bottle neck is narrow to hold up short stems and the bottles are always elegant.
Tabea
April 12, 2011 at 2:03 am
Thats great! How does someone get such a fantastic idea?!
Pingback
Pingback
Pingback
Pingback
Casey
April 21, 2011 at 10:28 am
This is such an awesome idea! I’m planning my 60’s theme housewarming party next month and little colored vases will be perfect for the table! Thanks!
Pingback
Cristina
April 22, 2011 at 11:54 am
This is just brilliant!! Must try this!
camilla
April 22, 2011 at 7:43 pm
Thanks Cristina! I want to try metallic balloons next – I think these would look great in silver. Take Care, Camilla
Pingback
Kimberly michelle
April 28, 2011 at 1:26 pm
Just pinned this!
camilla
April 28, 2011 at 6:12 pm
Hi Kimberly, So glad to hear it – thank you! C
Mimi
April 29, 2011 at 7:11 pm
Just when I think I have seen the most amazing thing I find your WAY more than amazing blog. I, too, thought the vase was porcelain or ceramic. But it’s a balloon! I hope it is okay to share your post {and a link to you} Because there is some serious good stuff going on here. I can’t thank you enough for sharing your ideas and creations. They are so fresh and unique! Love it.
camilla
April 30, 2011 at 6:54 am
Mimi, Wow! what a kind comment! I really appreciate it – I would be thrilled to have you link to my blog. Thanks! Have a wonderful weekend and take care, Camilla
Sarah
May 1, 2011 at 10:07 am
Très bonne idée !
Denise
May 2, 2011 at 1:30 pm
Wow!! I so love this idea! Hey I pinned this too 🙂
aafke7
May 3, 2011 at 2:05 am
:))) Lovely!
Wendy
May 3, 2011 at 4:42 am
This is just such a cute vase!! Thanks for sharing. So simple, but so nice!
Poppie
May 4, 2011 at 6:23 am
Wow, I love this idea! But… I can’t seem to get the balloon over the little vase. I’ve tried different sizes, but nothing has worked so far. Can anyone help me? How do you get the vase in the balloon?
Thanx!
camilla
May 4, 2011 at 10:46 am
Hi There! Thanks for contacting me with this question. I used a 12″ balloon and a 2″ votive holder – the smallest one I could find (some readers have also used a shot glass). I cut off the top of the balloon first and then stretched it over the votive holder. It is a bit of a struggle – but doable. I hope this helps. Let me know, Camilla
Pingback
Yvone
May 8, 2011 at 5:07 am
Oh my gosh that is absolute genius.
AbleApril
May 9, 2011 at 12:10 pm
Too much genius! I just posted this to the Parent Hacks FB page.
sylvie
May 11, 2011 at 2:32 pm
wouah wouaaaah, c’est génial!!! j’adore! I love it!
AbleApril
May 14, 2011 at 10:16 am
I just got word this is going to be featured on Parent Hacks’ site on Monday. Congrats!
Kendra
May 16, 2011 at 4:19 pm
Incredible! They’re just lovely–I would be proud to have them in my house. They’re made with things I already have–no trip to the store just to manage the simple craft project. And they take seconds–so no time-consuming project that frustrates more than it solves! (Can you tell I am super-frustrated in my thwarted Martha Stewart attemps?)
I found you via Parent Hacks, and what a hack! Thank you!
Jamie B
May 16, 2011 at 4:34 pm
I tried this as soon as I read it (because I had both supplies on hand). It was pretty difficult to get the balloon around the votive holder (but maybe I was using a smaller balloon, I’m not sure), and the opening on the balloon was a little deformed when I got it on there. But it looks great! I think I’m going to make several of them to hold the little dandelions my daughter gives me!
Sarah
May 18, 2011 at 9:35 pm
Genius! Definitely going to start doing this!
Lesley
May 19, 2011 at 9:50 am
You are so clever!
Grall delphine
May 21, 2011 at 5:51 am
GENIAL !!!!!!!!
bises
delphine
Susie
May 21, 2011 at 5:39 pm
Just brilliant!!! Can’t wait to try this out this summer!! If you don’t mind, I’d like to post your idea on my blog. A few of my friends who are moms will really appreciate the idea also. Thanks for sharing your ideas!!!
camilla
May 21, 2011 at 5:55 pm
Thanks Susie – I’d love to see the post – let me know when it’s up. Take Care, Camilla
Caroline Campos
June 22, 2011 at 1:00 pm
Simplesmente maravilhoso!!!
Lindo e fácil, vou fazer o meu agora!!!
Parabéns pelo Blog!
serena
July 5, 2011 at 7:31 am
Really cute!
Mary Cate
July 15, 2011 at 6:17 pm
More than cute, this is effin’ brilliant.
Pepette
August 20, 2011 at 11:41 am
Quelle bonne idée ! j’adore !
Lindsey
January 14, 2012 at 2:42 pm
This is the perfect way to make a casual Place Setting by adding your guests names and they have a sweet gift to take home with them to remember the event. I can’t wait to use them at my next Brunch, Baby Shower or one of the many other events I love to host. Genius Camilla.
camilla
January 14, 2012 at 2:51 pm
Thanks Lindsey – so glad to hear that you like this one! Take Care, Camilla
Lauren
June 13, 2012 at 10:46 pm
GOODNESS — these are ADORABLE!! Found these on Pinterest — Such a cute, clever idea!
ROSE LARACUENTE
July 22, 2012 at 12:47 am
GREAT IDEA WILL TRY IT SOON……THANKS I LOVE TO DO ANDTRY NEW IDEAS
Jill
August 2, 2012 at 8:11 pm
I LOVE this and now made my own, just a little different because of the jars I had on hand. If you want to look, I’d be honored!
http://www.jillruth.com/2012/08/so-bright-and-cheery.html
camilla
August 2, 2012 at 10:46 pm
Jill- They look great! I’m so glad you liked this project. Way to go! Also, thanks for linking back to my site 🙂 . -Camilla
Cori
May 19, 2013 at 10:56 am
this is so increible! so cheap and so chic!!!
loved it!
congratulations! really.
Cori