
Make your own velvet pumpkins in minutes - the kids can definitely do this one.


Make mini pumpkins too.

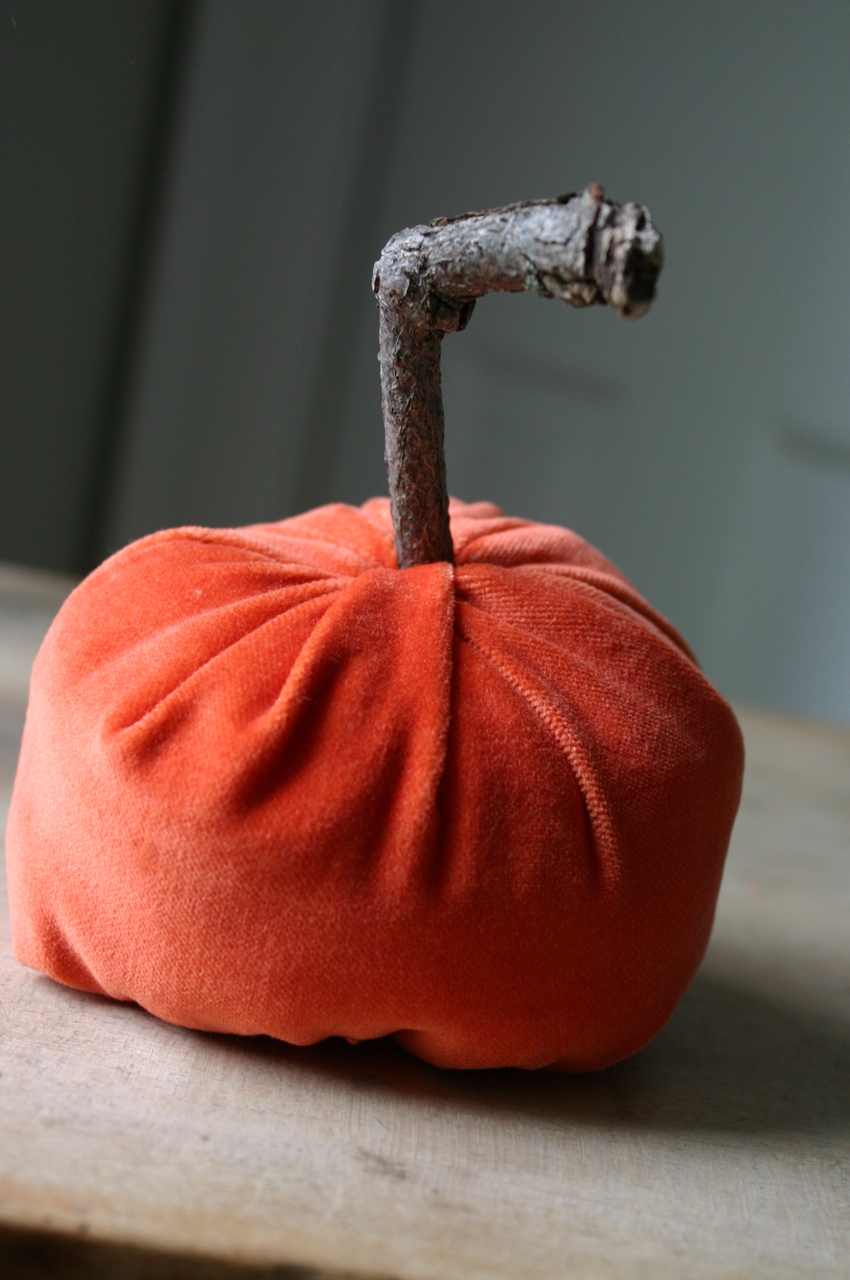
To make these you will need: a square piece of orange velvet (the bigger the square, the bigger the pumpkin), a 3 to 4-inch stick, stuffing and two rubber bands (one thin, one thick).

I like to use a crooked stick - it adds character.

Fold your square in half - right sides in - and sew closed on one side.

Place stick inside of top opening and secure with a thick rubber band.

Most of the stick should be inside of the velvet - as this will be your pumpkin's stem.

Turn inside out.

Fill with stuffing. Be sure to push the stuffing up so it surrounds the stem and gives your pumpkin a good shape. Once you have the size you want, secure tightly with a thin rubber band.

Trim the end and push it up into the pumpkin. To make this work best, I created a cavity in the stuffing so the knot would rest up inside of the pumpkin when sitting on a flat surface.

Done.

I made a tray of these pumpkins while my kids were at school yesterday - they noticed them right when they walked in the door.
Pumpkinbear
August 30, 2011 at 1:43 pm
Fun! I bet that would look cute with all kinds of fabric.
Resa
August 30, 2011 at 8:00 pm
You even managed to pick creepy looking sticks. I love this.
Julie
August 30, 2011 at 10:39 pm
Come over and see the haunted house we made out of an empty diaper box last night! Your pumpkins tie in nicely…we may need to make a few soon!!!
Gooseberry Patch
August 31, 2011 at 1:12 pm
LOVE this super-simple idea…thanks for sharing today!
Kristin
August 31, 2011 at 4:42 pm
What a easy and fast way to decorate for the season! Love it!
louise
September 1, 2011 at 1:11 am
Love these!! This would be a fun project to do with the kiddo as well. He’s been wanting to ‘help’ me sew a project. He’s 2. So this one stitch and then the rest putting together, fun fun fun! Thanks!
Georgina
September 1, 2011 at 2:33 am
I love it!!!
Rachel
September 1, 2011 at 11:47 am
Ooh pretty! Thanks for the how-to, I’ll be linking.
camilla
September 1, 2011 at 1:24 pm
Thanks Rachel! Have a great day, Camilla
linda
September 1, 2011 at 11:06 am
That is adorable! I love things that the kids can make that are truly cute!
Jenni
September 1, 2011 at 9:24 pm
I like your blog. I think we were seperated at birth…
Selena
September 5, 2011 at 6:33 pm
They have a fantastic look!